GoDot is an open source game engine, complete with a debugger and its own scripting language(s).
If you have Steam, GoDot can be installed from Steam. However, GoDot can also be downloaded and installed in a standalone manner. The “Standard version” should suffice unless you plan to use C# for coding purposes.
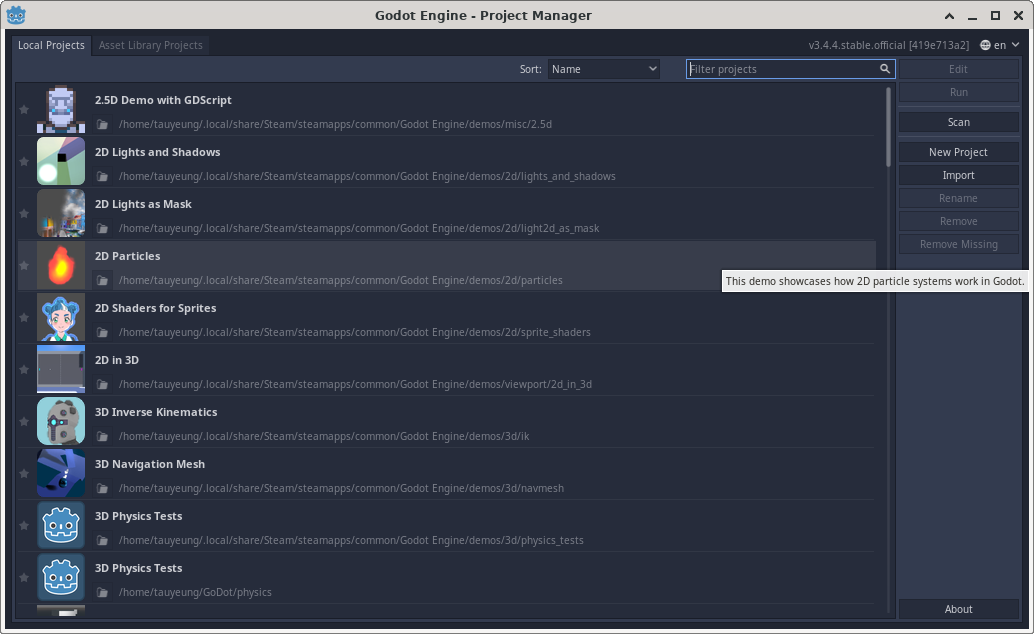
When GoDot starts, it presents the “Project Manager” with some pre-installed projects. For this module, we will be creating our first project.
Click “New Project” on the right hand side and create a new project. You will be prompted for the following entries:
You should see the editor of a project as follows:
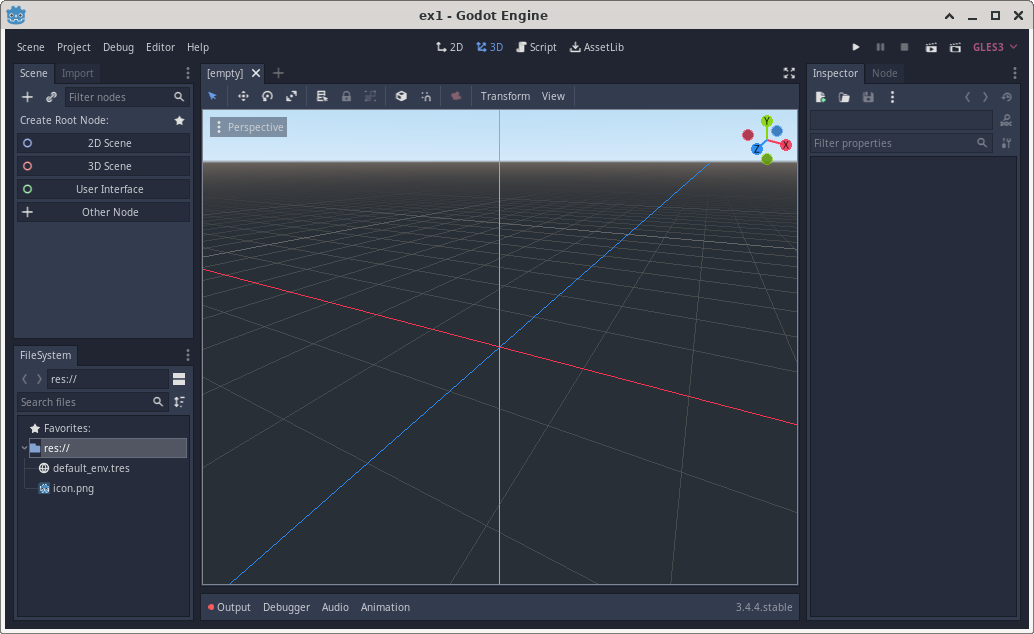
You can learn about the various parts of the GoDot editor by reading GoDot’s own documentation.
What is a node?
A “Node” in GoDot requires some explanation. Essentially, a “Node” is a unit to organize things. The most important relationship between nodes is “is a component of”. In other words, a node can serve as a component of another node.
The root node of a scene is the top-level container of everything related to a scene.
If you know OOP (object-oriented programming), the meaning of a node depends on the context. In the Scene dock, a node is, essentially a member of a class (except for the root node, which is top level container). However, when a node is created, the chosen node type is a class.
When a project is created, the scene dock looks like the following:
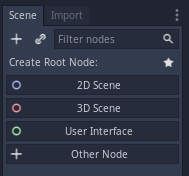
The root node of a project determines the type of the app:
For this exercise, we will be creating a “User Interface” project. Click “User Interface” and a “Control” node automatically becomes the root node.
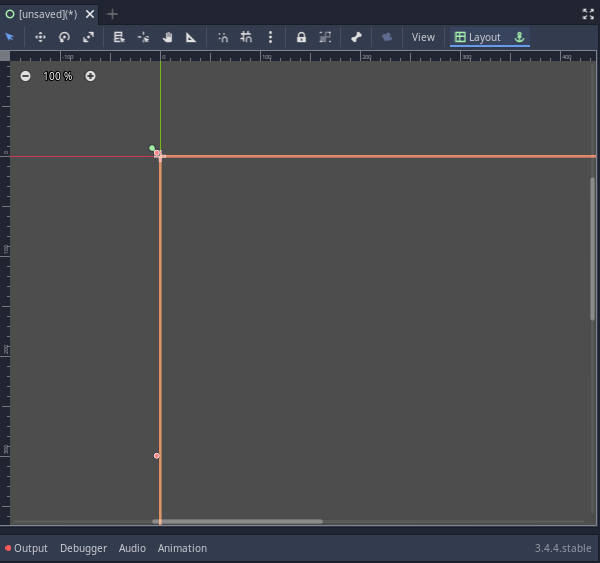
The editor should show the “canvas” of a user interface as follows at this point.
Hello world!Let us add a text label in the user interface.
+ button in the Scene dock,> button next to Control to expand all the sub-types of control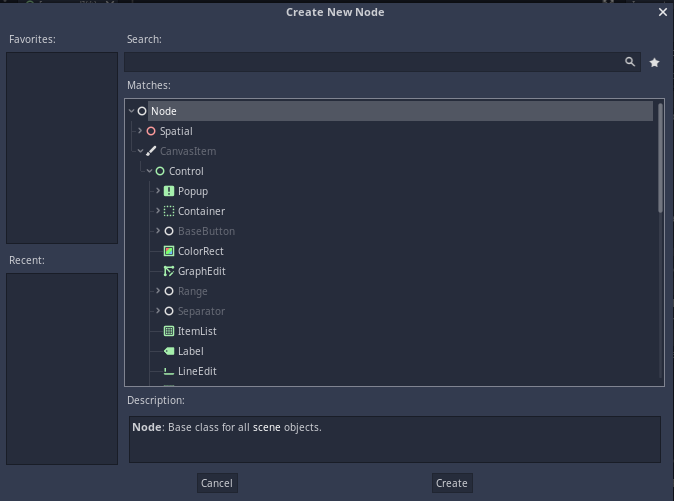
The canvas area should now show the Label node that was just created. You can move and resize it. More importantly, the Inspector dock now shows the properties of the newly created “Label” node.
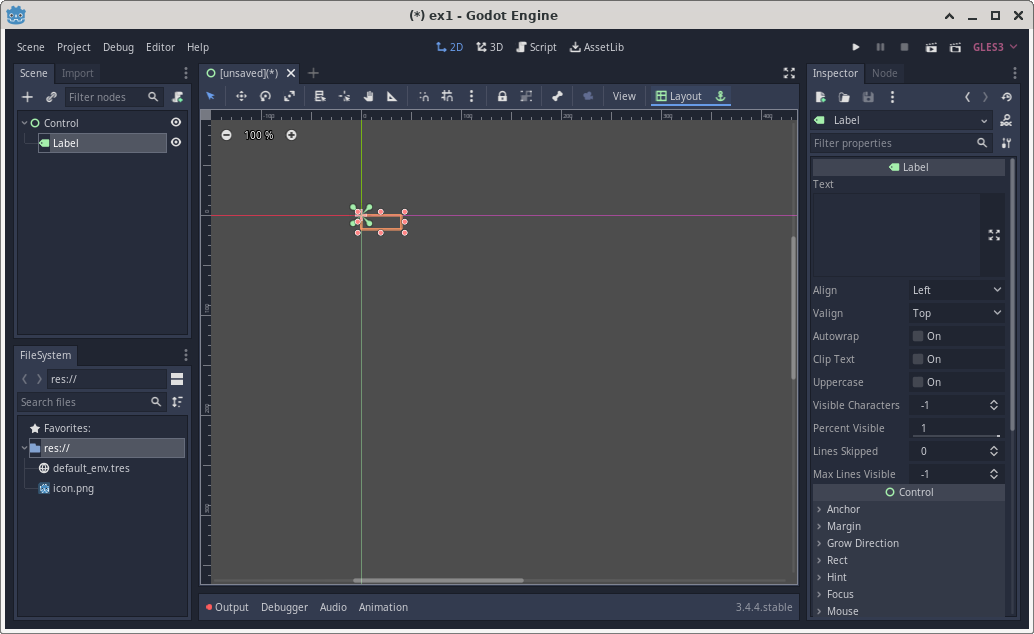
In the Scene Dock, the name of the “Label” node is, guess what, “Label”! This node name does not tell us what the Label node does in the app. Right click “Label” in the Scene Dock and select “rename”. Let us rename this label to “OutputLabel”.
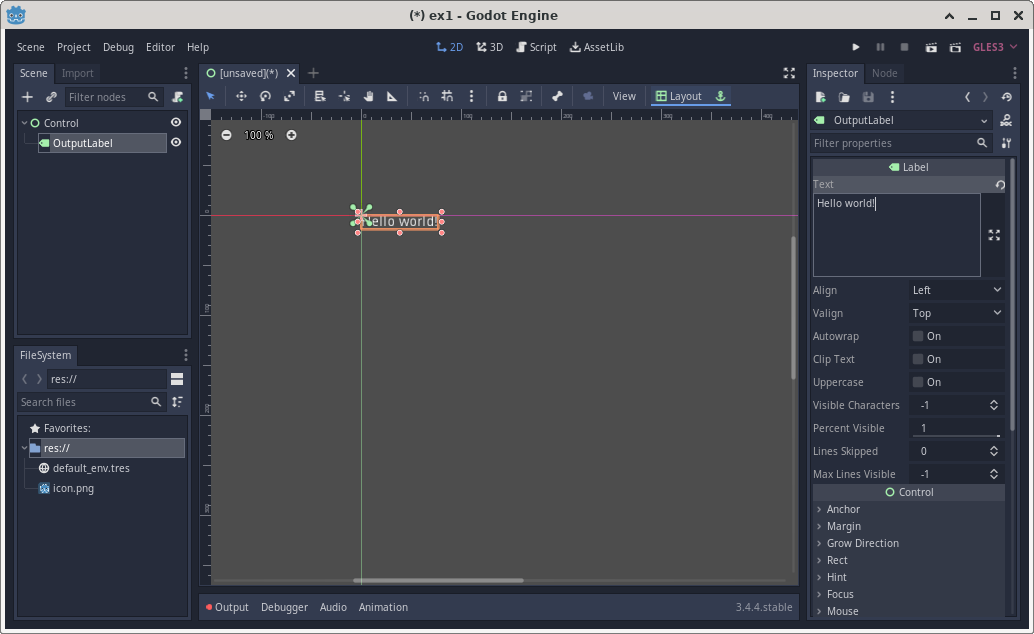
Next, in the Inspector Dock, change the “Text” property of the label to Hello world!. You should see the new text content of the label reflected in the Canvas Dock.
The editor should look like the following at this point:
Now is a good time to save the project. In the “Scene” menu, click “Save Scene”. GoDot will prompt you for the name of a file with tscn as its extension. For a simple project like this, the default file name is fine (based on the name of the root node of this scene).
After a scene is saved, you can see it listed in the FileSystem dock.
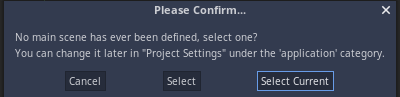
As much as this app is not useful, we can now run and see what it does. To do this, click the play button (a triangle pointing to the right) in the Toolbar. As soon as you click the play button, GoDot confirms what is the main scene of the app.
An app can have many scenes, the initial scene that is displayed when an app starts is the “main scene”. In this example, since the app only has a single scene, the “Select Current” option works fine.
What is a scene?
A “scene” in GoDot represents a container of a user interaction “thing”. Every scene has a root node.
Each app has a “main scene” that is presented when an app starts. As a project progresses, the “main scene” can be changed.
The term “scene” is a misnomer in GoDot. This is because a GoDot scene is more general than a user interaction “thing”. A scene is actually a cookie cutter of a structure of nodes. This is an advanced topic that will be explored in another module.
If you are already familiar with OOP, a scene in GoDot is, essentially, a class definition where the type of the root node is the superclass of the class (scene) being defined. This applies to the scene designated as the main scene. When GoDot starts, it automatically instantiates an object of the main scene as the start object of an app.
Obviously, this app does not interact with a user. It only presents a window that has a label that says Hello world!. Nonetheless, the process of creating this app introduced us to concepts of GoDot apps.
When you are done editing a project, you can use “Scene | Quit” to exit GoDot entirely, or use “Project | Quit to Project List” to get back to the Project Manager.
If you want to remove a project, click the project in the Project Manager, then click “Remove” on the right hand side. Check the box labeled “Also delete project contents (no undo!)” if you want to completely remove a project and not just to unlink it from the Project Manager.
You can download this project as a ZIP file. Unzipping this file creates its own folder called ex1 (for “example 1”). You can use the “Import” button in the Project Manager of GoDot to add project from newly unZIPped folder containing files of a project.
In order to utilize the saved project, do the following:
project.godot in the new project folder